Install Packages
At a glance
Download your package file(s). Click the 'Install package' button in Floe's Preferences panel. Direct it to the package file.
Full instructions
Firstly, if you haven't already, download & install Floe. Next, load up the Floe plugin in your DAW.
Download your chosen package(s) (.floe-pkg or .floe-pkg-enc files containing sample libraries and presets).
To install:
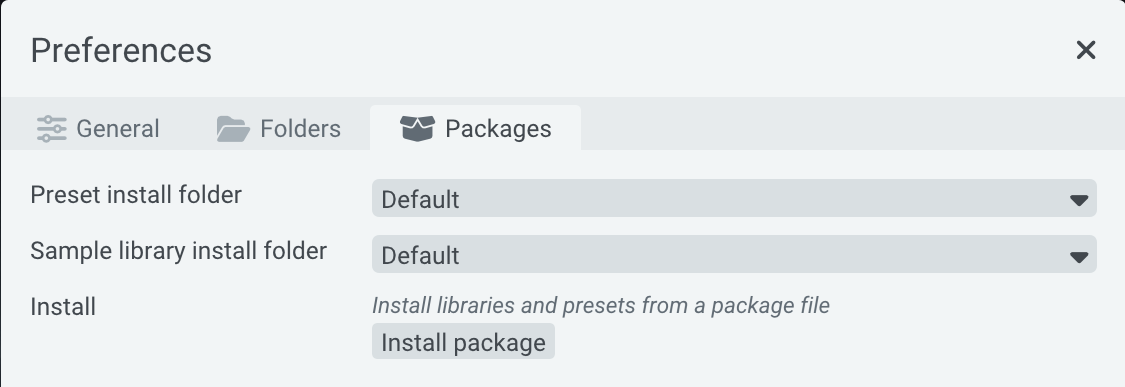
- Open Floe's Preferences panel ( cog icon)
- Go to the Packages tab
- Click 'Install package' and select your package file(s)
- Done - libraries/presets are immediately available
The package files can be deleted after installation. No restart required.
Advanced Details
What is a package?
A package is the portable distribution container used by Floe. It's exclusively used as the format for downloading and installing content.
A package may contain:
- Samples Libraries
- Presets/Preset Banks
Typically, a package contains one sample library, and a bank of factory presets for the library.
But alternatively, a package could also contain only presets, or a collection of sample libraries, or any combination.
Floe doesn't remember packages after installation; they're just a means to get content onto your computer. Packages are created using Floe's packaging tools, or using a ZIP utility.
Encrypted packages
Some packages use the .floe-pkg-enc format. Installation is the same as any other package — click 'Install package' and select the file — with one extra step: Floe prompts for a license key.
Encrypted packages require Floe version 2 or later.

Paste the license key provided by the package developer, then click Activate. The whole process is offline; no internet connection or account is required.
A license key is personal to you and embeds your identifying information.
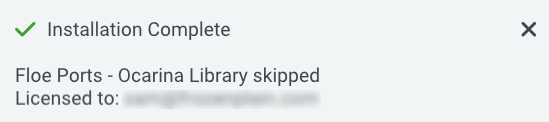
Once installed, Floe shows who the package is licensed to:
ZIPs
As of Floe version 2, Floe's default for packages now use .floe-pkg or .floe-pkg-enc format. The default used to be .zip files.
Floe still supports packages in ZIP format. We switched to floe-pkg because it's natural to extract a ZIP as soon as you download it, but Floe's 'Install Package' button wanted the ZIP un-extracted, often leaving to confusion and hassle.
If you still have a package ZIP, you can still install it. Don't extract it, leave it as a ZIP file and direct Floe to it using 'Install Package'. If you're on macOS: be aware that Safari automatically extracts ZIP files after downloading. To prevent this, open Safari's settings and uncheck Open "safe" files after downloading in the General tab.
Install to a custom location
- Create custom folders using Finder/File Explorer such as "Floe Libraries" and "Floe Presets"
- Add them to Floe's preferences under their respective heading
- Select them on the Package install folder menus
Full details
By default, Floe installs content to standard folders on your main drive. This can be changed though by selecting custom folders in the Preferences panel's Packages tab.
If you've not done this before, the dropdowns for install folder menus might only show 'Default' locations. You need to first tell Floe about your custom folders and then select them here.
To do that, use your file browser program (Finder/File Explorer) and create the folder(s) where you want to keep Floe content and add them on Floe's preferences.
Floe uses separate folders for sample libraries versus presets, so you might want to create one for each. For example, on your SAMPLES hard drive, create folders: "Floe Libraries" and "Floe Presets". Add these 2 folders on Floe's preferences panels and select them as the default installation locations.
Further details about folder management can be found on the Folders page.
How 'Install package' works
Floe handles the installation process intelligently. It will check existing installations across all known folders, check for conflicts and handle upgrades. It will even detect if you've modified a library and give you the option to keep your modified version. It will ask you about skipping or overwriting if it needs too. It will never duplicate libraries unnecessarily.
Manually installing
For non-encrypted packages, (.floe-pkg or .zip), you can manually install libraries and presets by extracting the package file into the correct folders (instead of using the 'install package' button). Despite the different extension, .floe-pkg are also just ZIP files. You might want to first rename it to .zip and then extract it using any ZIP extraction tool - often just a matter of double-clicking on it.
- Extract the package file.
- Open Floe.
- Open the Preferences panel using the gear icon at the top.
- Open the Folders tab.
- Here you can control which folders Floe looks for libraries and presets in. Copy/move the contents of the package's Libraries into one of Floe's library folders, and the same for Presets into one Floe's presets folder.
- Done. No need to restart Floe.
Note: .floe-pkg-enc (encrypted) packages cannot be manually extracted; they must be installed through Floe using a license key.
Convert floe-pkg to zip
No conversion needed! Just change the file extension from 'floe-pkg' to 'zip'. This only works for .floe-pkg files, not encrypted .floe-pkg-enc files. There are countless ways to do this. As quick guidance for our users:
- On macOS Finder: right-click the file -> Get Info -> edit Name & Extension.
- On Windows File Explorer: View -> Show -> File name extensions. Then right-click the file and rename.
Uninstalling packages
Floe doesn't track packages - they are just the installation format. However, you can uninstall libraries and presets. Visit the Uninstalling page for full instructions.
Mirage Compatibility
If the package is a Mirage library and you are getting errors about missing Mirage Compatibility, download Mirage Compatibility Package.floe-pkg and install it like any other package.