MIDI
Floe is controllable via MIDI in the typical ways you'd expect from a software instrument.
MIDI CC
Default MIDI CC mappings
Floe applies some default MIDI CC mappings when it starts. These are the defaults out of the box, but you have full control to remove or change them — see the sections below. The default mappings are:
- CC 1 (Modwheel) — Macro 1
- CC 7 — Master Volume
- CC 11 — Master Timbre
You can disable the whole set via the Default CC mappings option in the MIDI CC Assignments panel (or in Preferences). While that option is enabled, the defaults are reapplied every time Floe starts — so removing an individual default mapping only clears it from the current instance.
MIDI CC Assignments panel
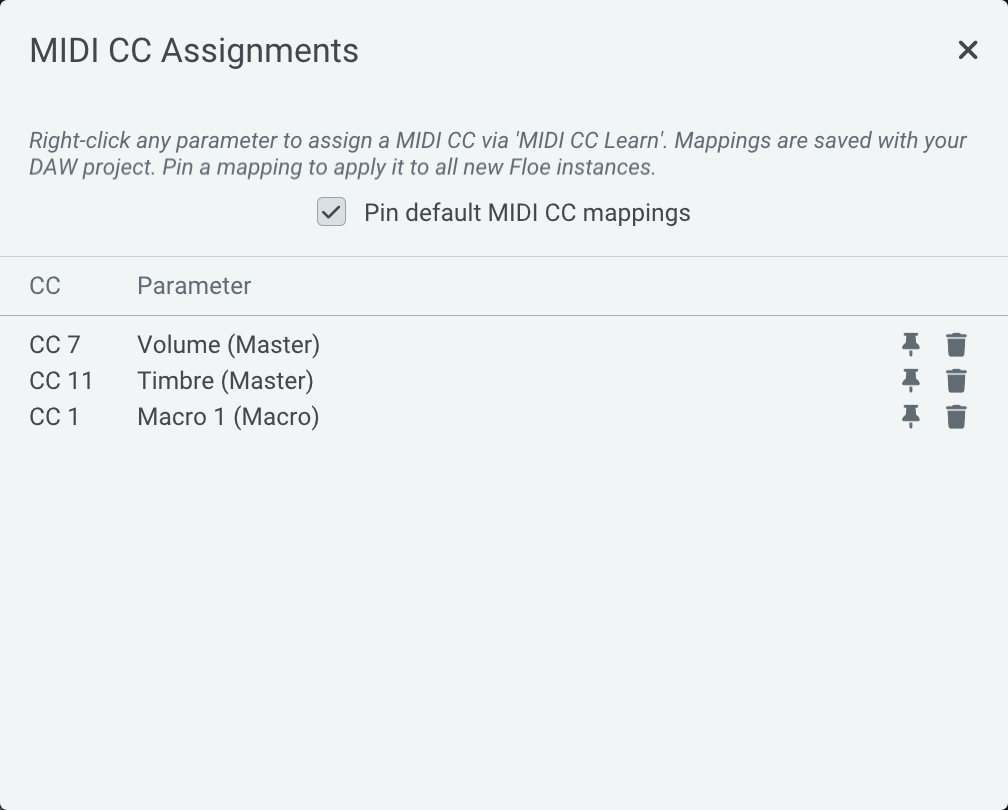
You can view and manage all MIDI CC assignments from the MIDI CC Assignments panel. Open it from the top-panel menu (the three-dots button).
This panel shows every active CC-to-parameter mapping, including which module each parameter belongs to. From here you can pin or unpin mappings, remove them, and toggle the default CC mappings option.
Creating MIDI CC mappings
All automatable parameters in Floe can be assigned to a MIDI CC. This allows you to control Floe from a MIDI controller for example.
To create a mapping, right-click on the parameter you want to assign and select MIDI CC Learn. Then move the control on your MIDI controller that you want to assign to that parameter. This will create a mapping between the parameter and the MIDI CC.
You can remove a mapping by right-clicking on the parameter and selecting Remove MIDI CC, or by using the trash icon in the MIDI CC Assignments panel.
How mappings are saved
MIDI CC mappings are saved with your DAW project. By default they only apply to the current instance of Floe in your DAW — they won't be applied if you load a new instance. If you want a mapping to apply to every new instance, pin it (see below).
Preset files do not save MIDI CC mappings. So you can load presets and your MIDI CC mappings will remain.
Pinning mappings
You can pin a MIDI CC mapping so that it is automatically applied to all new Floe instances. There are two ways to pin a mapping:
- In the MIDI CC Assignments panel, click the pin icon next to a mapping.
- Right-click a parameter that has a CC mapping and select Pin MIDI CC.
Pinned mappings are stored globally in your preferences, not in your DAW project.
Sustain Pedal
Floe supports sustain pedal control via MIDI CC-64. When the sustain pedal is pressed, currently held notes will continue playing even after key release, until the pedal is released. This mimics standard piano sustain pedal behaviour.
Pitch Wheel
Floe supports the MIDI pitch wheel. The extent of the pitch bend can be configured individually for each layer by using the pitch bend range parameter on the Config tab of each layer. This per-layer configuration allows for interesting sound design possibilities. A pitch bend range of 0 will disable pitch bend for that layer.
Velocity
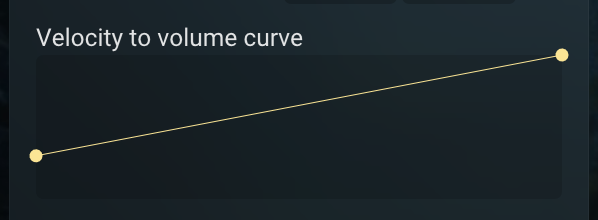
Each layer has a customisable velocity-to-volume curve that shapes how hard you play (MIDI velocity) into the volume of each note.
How the curve works
The horizontal axis is velocity — far left is the softest possible velocity (MIDI value 1), far right is the hardest (MIDI value 127), and higher-resolution velocity from DAWs that support it works too. The vertical axis is the resulting note volume. When you play a note, a red indicator appears at its velocity position on the curve so you can see where you're playing.
A straight line from bottom-left to top-right gives a 1:1 response — the harder you play, the louder the note, in equal proportion. By moving, adding, or removing control points (and reshaping the curve between them), you can change this relationship: make soft playing louder than it would be naturally, cap the volume of hard hits, or create a non-linear response that emphasises a particular dynamic range. Setting different curves across the 3 layers also opens up creative sound design — for example, fading one layer in as you play harder while another fades out.
By default the curve doesn't start at zero, so even a zero-velocity note still produces a quiet sound. You can drag the left-most point down to silence if you want zero-velocity notes to be inaudible.
Velocity and multisampled instruments
It's worth noting that velocity does more than just control volume. For multisampled instruments that contain separate velocity layers, a note's velocity also selects which sample is played — not just how loud it is. A low-velocity note on a piano, for instance, plays the soft-velocity samples (with their distinct tone and character) rather than a quieter version of the hard-hit samples. The velocity curve only reshapes the volume response; it doesn't change which velocity layer gets triggered.
Editing velocity curves
Find the velocity curve editor on the Config tab for each layer.
- Double-click anywhere on the curve to add a control point (up to 6 per layer)
- Drag control points to move them
- Drag between points to adjust curve shape
- Double-click a point to remove it
- Right-click for menu options